CAME-Mini

If your Gimbal is Beeping more than 15 times and continues non-stop, this could be a Low Battery Warning. If the beeping stops after about 13-14 beeps, this could be a Calibration Process (see here).

If the beeping does not stop, try to charge the battery for several hours and then try again.

If you feel you have left your battery charging long enough and are still having continuous beeping, you may either have a bad battery (not holding correct voltage) or possibly a bad Battery Charger.

Try another battery, or try another battery charger with your existing battery.

If your gimbal beeps several several times (approximately 13 times) whenever you restart the system, this could be a Calibration Mode. If it continues to beep non-stop, this most likely is a Low Battery Warning (see here).

When your Gimbal is going through a Calibration process it is important to have the entire gimbal level, hold the camera level, and also hold the gimbal frame square and centered. Once it is done calibrating, the gimbal should hold the camera position. If you allow the calibration to process while the gimbal or camera is not level, the calibration will be set to whatever position you allowed it to process.

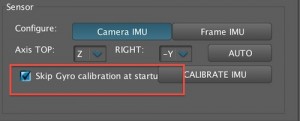
We suggest disabling this feature and to only perform Calibration Manually when needed. To disable the Calibration process each time you restart, connect to the software and select the option 'Skip Calibration on Startup' under the Basic Tab.

skip-calibration-startup

Make sure to click on the Write Button to save your settings. Now each time you startup, the Gimbal will boot up immediately.

When connecting the Gimbal via USB to the software, sometimes you may find the motors do not operate when you power the entire system On. The problem may be a setting in the software that temporarily disables the Motors. This setting is used when you are working on the gimbal, and need to change settings without powering the system off or disconnecting.

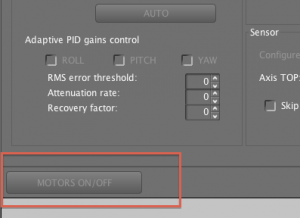
To turn the motors back on, click on the Motors ON/OFF Button located at the lower left of the SimpleBGC Application Screen.

SimpleBGC Motors On OFF Button

If your system is powered on and connected to the Software, this button will toggle power to the Motors On or OFF.

IMPORTANT DISCLAIMER: Please know that all CAME-TV gimbals come pre-programmed to properly function and stabilize right out of the box without the need for software tuning. However, if you choose to make adjustments using the SimpleBGC software, you do so at your own risk. If or when you choose to do so, we strongly urge you NOT to make any changes that are not recommended by us. Doing so may affect your gimbal's functionality, and may require you to send it into one of our facilities for repair at your own cost (if still under warranty). Before making any of the suggested changes below, we also advise that you save your current profiles once connecting and/or capture screenshots of each tab & profile. And perhaps most importantly, NEVER UPGRADE YOUR FIRMWARE, even if the SimpleBGC software tells you to.
——

AT-A-GLANCE CHECKLIST - What you'll need in order to successfully connect to the SimpleBGC software.

- A Mini USB cable capable of data transfers (the type used for hard drives, not smartphones)
- Make sure Java is up to date
- Download necessary driver
- Install correct version of software

FINDING THE CORRECT DRIVER AND SOFTWARE

In order to run the SimpleBGC software on a MAC OSX, you first need to download the MAC driver for the software which can be found by Clicking Here>>.

For Windows computers, when you connect the gimbal to your computer, it may automatically install the proper drive. If the driver for the gimbal was not installed then you can find the driver by  Clicking Here>>.

Once you have downloaded & installed the driver, you then would need the SimpleBGC software that matches the firmware on your Control Board Here>> (If you are on Windows use the .exe file and for Mac use the .jar file).

ARTICLE: HOW DO I KNOW WHICH SOFTWARE VERSION TO USE WITH MY GIMBAL?

ONCE YOU ARE READY TO CONNECT

(For Mac OSX)
After you have downloaded and unzipped the software, you will see the following files below. You need to make sure to launch the SimpleBGC_GUI.jar file on a MAC system.
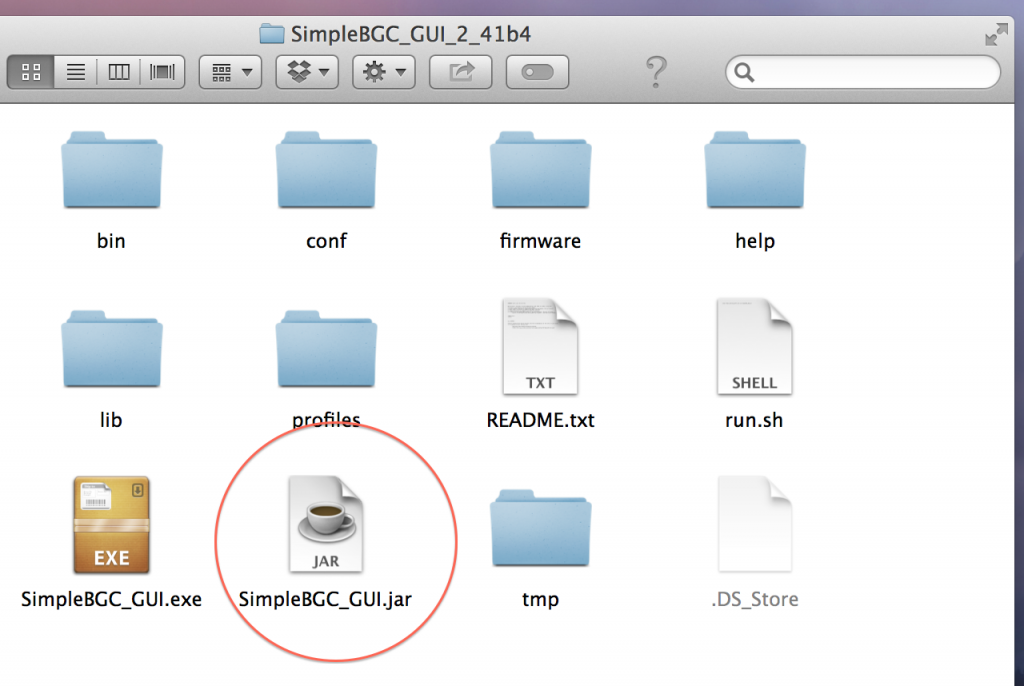
unzip-launch-sbgc-software-1024x686


You may be prompted with a message saying that your system cannot open the file from an 'unidentified developer'.
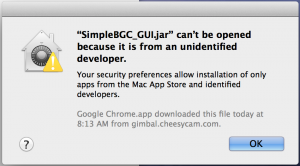
Screen-Shot-2014-06-27-at-8.15.23-AM-300x166

If that is the case, you would need to 'Control + Click' or 'right click' on the file and choose Open.
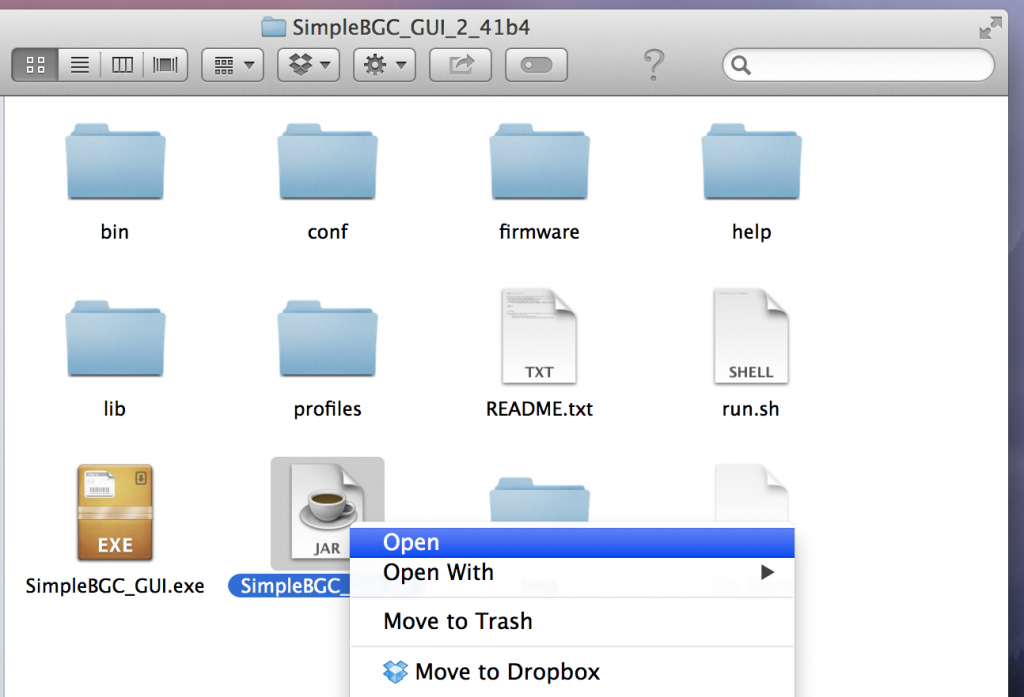
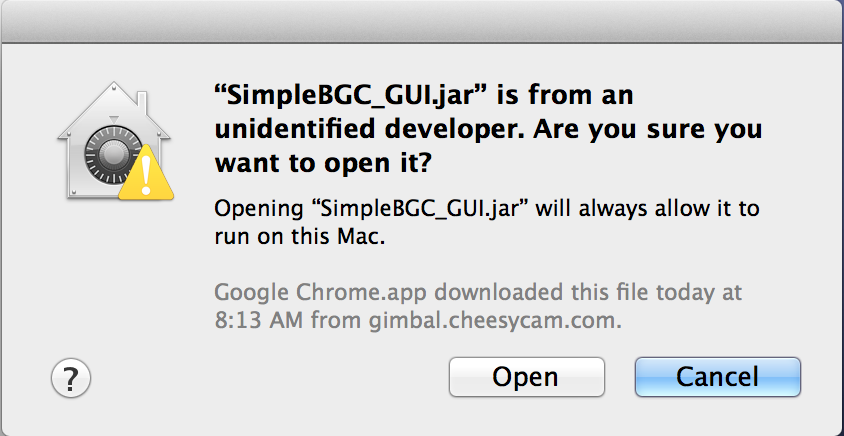
Right-Click-Launch-SBGC-Software-Security-Settings-1024x697Unindentified-developer-open-software-SBGC-Gimbal


WARNING: In the event that you receive an error message stating a "GUI Version Mismatch," this means that the software version you are attempting to use is not compatible with the firmware used to program your gimbal's board. No matter what, DO NOT UPGRADE THE FIRMWARE, even if the SimpleBGC software tells you to do so. Doing so will wipe your board's settings and prevent your gimbal from functioning normally. Click here for instructions on how to proceed if you are asked to upgrade your firmware.

Shown above: When your gimbal's board (& associated firmware) conflicts with the SimpleBGC software that you are attempting to connect to. Click here for more information.

(Both Windows and Mac OSX)
You should now see the SimpleBGC GUI software. Once the gimbal is securely connected via USB Data Cable, choose the appropriate port (usually the last one), and click connect on the top left.
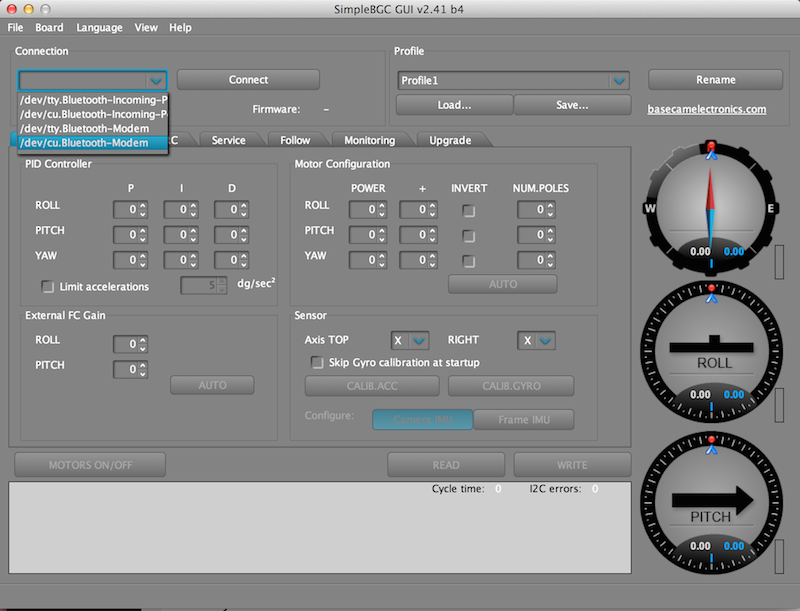
Connect-to-SIMPLEBGC-Basecam-32-Bit-gimbal-board


Please Note: If you are unable to connect the gimbal to the SimpleBGC software, please make sure your USB Cable is a Data Cable. Some USB cables are only used to charge devices and not a true Data USB Cable. Try swapping the USB Cable, reload the software, and try again.

ONCE CONNECTED

WARNING: We must again strongly urge that you do not suggest making any changes to software settings without direct guidance from a CAME-TV representative. Changing the wrong settings can cause malfunction to your gimbal's performance, and may cause the need to send it in for repair at your cost (if still under warranty).

THE BASICS
Typically, the connection port is the last one that is listed on drop down menu (and it is highlighted by default). Once you have it selected, click on the CONNECT button. Once you are connected, you will see values populate the screen. It is only after you successfully connect to the SimpleBGC software is it ok to turn on your gimbal. Turning on your gimbal may be necessary to do on-the-spot testing, such as adjusting motor power, or joystick speeds.

If you are connecting because of erratic behavior from your gimbal (shaking, spinning), you can always simply hit the MOTOR ON/OFF switch to temporarily deactivate the motors, but keep the gimbal powered up and connected.

Once you have familiarized yourself with the software, and have made the necessary changes (ex: increased motor power), you can click on the WRITE button to save your settings.

Once you have all the changes necessary and are ready to discontinue use, simply hit the DISCONNECT button on the top left of the screen. Once disconnected, you may remove cable from your gimbal and resume use.

The CAME-MINI 2 is a full 3-Axis stabilizer (Pitch, Roll, and Yaw) using the latest 32 Bit SBGC controller with Dual IMU sensors. This is the most advanced controller and sensor combination available for gimbals using SBGC system.

The Max payload for the CAME-MINI Gimbal is approximately 1kg. The system works best with cameras such as the Sony A7s, Panasonic GH4, and BlackMagic Design Pocket Cinema Camera (BMPCC), etc.

This video by MrCheesycam will show you how to perform Quick Basic Sensor and Frame Calibrations with your on CAME-TV Gimbal. It will also show you how to add the Service Mode 4 & 5 to your system so that you can perform future Calibrations without a computer.

Calibrating your Sensors can often fix small issues such as camera drifting, unlevel camera position, uneven frame positions, and overall stability. Many CAME-TV Gimbals allow you to switch to Inverted Mode by first powering off the Gimbal, inverting the gimbal frame, and then restarting the system. The gimbal will auto detect inverted mode.

Whenever inverting your Gimbal or using it in normal mode, it can be helpful to re-calibrate your sensors when switching positions. By using Service Mode 4 and Service Mode 5 after starting your system, you can calibrate your camera position and it will assist for more stable performance.

We also suggest taking a look at this article to show you how Service Modes and Profiles can be used with a Gimbal System.

This video by MrCheesycam should only be used as a reference for restoring your the default configuration found on the CAME-TV CAME-MINI2 Gimbal using firmware 2.43 b9.

While you can use the video as reference to copy the settings exactly, there are a few areas in which you DO NOT want to change on your system. This video will explain which options you should copy, and which settings you should NOT COPY.

Primarily you do not want to change your default Invert settings under Motor Configuration. If you believe you need to make changes to your Invert options, you can view our FAQ Article About Gimbal Motor Invert Options.

Do not change your default RC Trim Settings according to the settings in the video above. If you believe you need to make changes to your RC Trim Settings, you can view our FAQ Article about Gimbal RC Settings.

For additional information about the CAME-MINI2 Gimbal, We suggest visiting our blog article regarding How To Use Service Modes and Profiles with the CAME-MINI2 Gimbal by MrCheesycam found here.