Due to popular demand, we have developed a dual handle mounting system that you can now use with your CAME-Single. If you have this new accessory, but are unfamiliar how to assemble it, you can watch the video for step-by-step instructions on how properly to put it together.
FAQ
How to properly replace your CAME-Single battery
If you recently received a brand new CAME-Single battery to replace your old one, but are unsure of how to install it, feel free to watch the video below to help guide you through the process.
After installing your new battery, please know that a full charge can be achieved in 2-4 hours (depending on current battery life). To assure full functionality, we suggest staying close to your gimbal during the charging process so that it does not overcharge. Overnight and/or unsupervised charging is not advised.
If you own a CAME-Single and suspect that the original built-in battery may be giving you problems (power problems, overheating), you can notify our support department and they can assist you with the matter.
NOTE: If your CAME-Single's handle internal battery configuration contains an extra protective circuit board and differs from the one shown above, then please see this video for steps on how to replace. If you are unfamiliar with the soldering process that is required for this alternate installation process, we'd suggest bringing your Single & battery into a professional electronics/repair shop so they can do it for you.
What are the payloads for the 2 spring arm options for your Pro Steadicam system?
If you are interested in purchasing our 2.5-15 kg Load Pro Steadicam, you may have noticed that 2 different spring arms are available for purchase. The Strong Spring Arm (L4A) is designed to support heavier loads ranging from 6-15 kg (for camera + battery + other accessories). However, if you have a lighter camera setup, then you can opt to instead order the Light Spring Arm (L3A) option, which is capable of supporting 2.5-6kg loads.
Light arm payload: 2.5 - 6kg (5.5 - 13 lbs)
Heavy arm payload (default): 6 - 15kg (13.1 lbs - 33 lbs)
CAME-TV Authorized Versions of the SimpleBGC GUI Software
Below is a list of authorized versions of the SimpleBGC GUI software to use with our CAME-TV gimbals. Instructions for connection and use can be found here. If you are unsure of which version below is appropriate for your gimbal, click HERE.
2.63 b0 Currently available for the CAME-Prophet gimbal only. Contact us if needed.
2.60 b4 Currently available for CAME-Prodigy and newer CAME-Optimus models only. Contact us if needed.
2.56 b7
GUI (Windows, OS X, Linux): SimpleBGC_GUI_2_56b7.zip (8Mb 20.01.2016)
User Manual (English): SimpleBGC_32bit_manual_2_5x_eng.pdf (1Mb 29.06.2016)
2.55b3
GUI (Windows, OS X, Linux): SimpleBGC_GUI_2_55b3.zip (7.95Mb 17.02.2015)
2.50b3
GUI (Windows, OS X, Linux): SimpleBGC_GUI_2_50b3.zip (8Mb 14.04.2015)
User Manual (English): SimpleBGC_32bit_manual_2_50_eng.pdf (1Mb 6.05.2015)
2.43b9
GUI (Windows, OS X, Linux): SimpleBGC_GUI_2_43b9.zip (6Mb 14.04.2015)
User Manual (English): SimpleBGC_32bit_manual_2_43_eng.pdf (813Kb 8.12.2014)
If you are in need of 2.60 b4, contact us first.
SimpleBGC GUI software is developed and provided by BasecamElectronics.com.
How to balance your smartphone on the Action-2 Gimbal
Even though the CAME-Action 2 gimbal for smartphones allows for an easy plug & play setup, like other CAME-TV gimbals, it does require a little bit of balancing for optimal use & stabilization. As shown in the video below, you want to make sure that your smartphone is steadily balanced along both the Roll and Pitch axes.
Once you have a proper balance, then you can commence using smooth gimbal shots with your smartphone.
How do I charge the battery for my Mini-3 or Argo gimbal?
Customers of our newer gimbals may have noticed that the battery charger kits for the CAME-Argo and Mini 3 are slightly different from how they used to be. With this slight change, there is an updated process on how to properly charge your batteries for these gimbals. See the video below for a simple step-by-step breakdown.
The blue LED indicator lights on the battery itself will not blink as it is charging. However, you can press the button to see the progress of the charge.
Do you sell spare parts for your CAME-TV product separately?
In general, yes we do sell most spare parts for many (but not all) of our CAME-TV products. For example, if you are in need of parts such as a replacement QR plate for your CAME-TV gimbal, or a spare power adapter for your LED light, then fill out this form and one of our associates will contact you to let you know if your requested part is available for purchase.
Instead of sending a video link as requested on the form, you can send a link to an image for the part that you are in need of. If you are requesting a part that you've lost and cannot take a picture of it to send. Then you can go to that item's product page on our website, download a picture, and simply highlight or circle the specific part that you are in need of. Once you have the image ready, create a shareable link (ex: via imgur, Dropbox) out of it and include it when emailing our technical support staff.
Mini-3 Gimbal User Manual
A few customers have reported that their recently purchased Mini-3 gimbal did not have an instructional manual that came with it. For those who are in need of it, you can find an online version of the manual available for viewing & download here.
Also, below is a video by YouTube reviewer MrCheesycam who does a very thorough overview of the Mini-3.
Problems Pairing Wireless Remote with your CAME-TV gimbal
We've received a few reports from CAME-Single customers who are experiencing problems pairing their CAME-Single with the wireless bluetooth remote . Please first note that all gimbals leave the warehouse pre-paired, and should NOT require this process. However, for those experiencing the problem of not having their gimbal & remote paired right out of the box, please follow the video below for a few additional steps on how to manually do so.
1. Find a small metal stick like a paper clip to use as your main tool.
2. Make sure your wireless remote receiver is properly installed in your Single.
3. Power on both your Single and remote.
4. Poke the metal stick into the remote's center hole for about 5 seconds.
5. Poke the metal stick into the tiny hole on the Single's handle & hold it there. Move the joystick around and the gimbal should eventually respond to the joystick movements (this could take a few minutes).
If you have a CAME-Argo or CAME-Mini3 with a similar problem, you can follow the steps in the video below:
Lastly, if you have problems pairing the newer CSWR-4 remote, please follow the process shown in the video below to sync it with your gimbal.
Do you have any support for customers based in the United States?
In an effort to provide 100% customer satisfaction we have recently established a Service and Support Facility based in the USA for customers located in the United States, Canada, South America and Mexico.
North and South America customers can be confident in receiving support for all technical issues and/or questions. If needed, our facility is equipped to handle Returns, Exchanges, or Repairs (that fall under our Warranty Policy) with faster turn around times and lower shipping costs as opposed to international shipping.
For further assistance, please contact our customer support department during the following times: Monday to Thursday 09:00 - 17:00 (PST), Friday 09:00 - 14:00 (PST).
Please Note: All inquiries will be addressed in the order that they are received and all orders still fall under our Return and Warranty Policy.
What is the best way to send you videos for support?
If you are already in contact with a CAME-TV support associate regarding a problem or concern with your product, then we recommend sending videos in 1 of the 4 ways listed below. In the video itself, you can simply shoot it with your smartphone and through your POV (or while mounted on a tripod). It is easiest for us to diagnose and troubleshoot a problem remotely if we see exactly what you see.
(Ex: If you are reporting a problem with a shaking gimbal, shoot the video so we see the gimbal in the shot. Do not send a video from the gimbal camera's point of view).
1. Unlisted YouTube Video - Please upload a video to YouTube, save it as Unlisted and then send us the link.
2. DropBox shareable link - Simply upload the video to your DropBox account and provide us with a shareable link.
3. Vimeo Link (Password Protected) - If you have a Vimeo account, you can upload the video and encrypt it with a password for external viewing. You can then send us the video link along with the password that unlocks the viewing restrictions so we can view it on our end.
4. WeTransfer.com Digi-Delivery - If you do not own or have access to any of the accounts listed above, then you can send us your movies for free using WeTransfer.com. You can send multiple files up to 2GB per email for free and no account or membership is needed.
NOTES:
Why do I need to send a video for support?
- First and foremost, by giving our technical staff a first hand look at the issue that you are reporting, they may be able to recognize the problem more easily and in turn provide a timely solution.
- In the past, there have been incidents where customers have presented false claims of product malfunction/defect in order to receive a replacement for their product (which in truth was not defective). Providing a video is a way to show us and confirm that there indeed a manufacturing flaw with an item that is in need of support and/or repair.
Can I just send the video as an email attachment?
- We'd prefer that you DO NOT send videos through email attachments for several reasons.
1) Our support team uses a 3rd party email ticketing/organization system that limits all attachments to only 7mb. Most videos usually are larger in file size and will not be transmitted successfully.
2) Our email software is very sensitive in its security features, and at its discretion, will put suspicious emails with attachments into a spam/junk mail folder, which we likely will not be able to immediately see.
How do I know when my CAME-Single is done charging?
A very basic, yet common question that we get is "How do I know when my CAME-Single is done charging?" First off, a full charge can typically be accomplished in about 2-4 hours. Keeping it plugged in any longer can run the risk of overcharging your battery, and causing it to go into a protective sleep mode.
However, as a visual indicator of the battery's charge status, you can look no further than the LED indicator light that is on the charging plug.
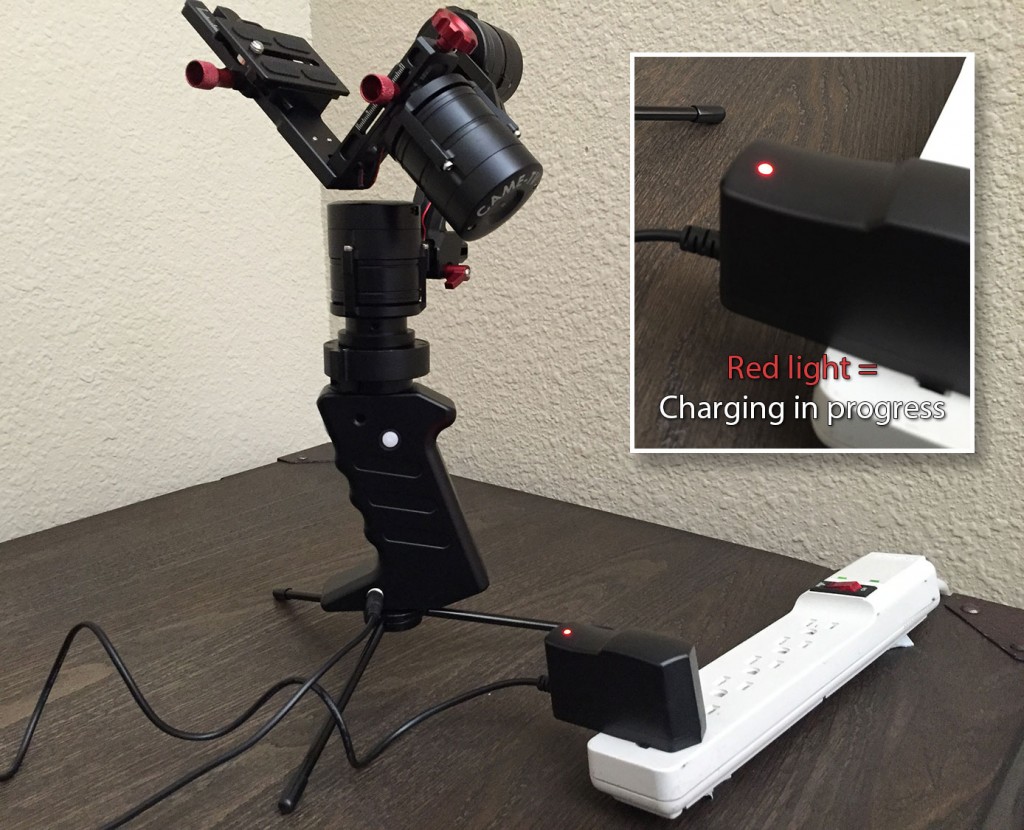
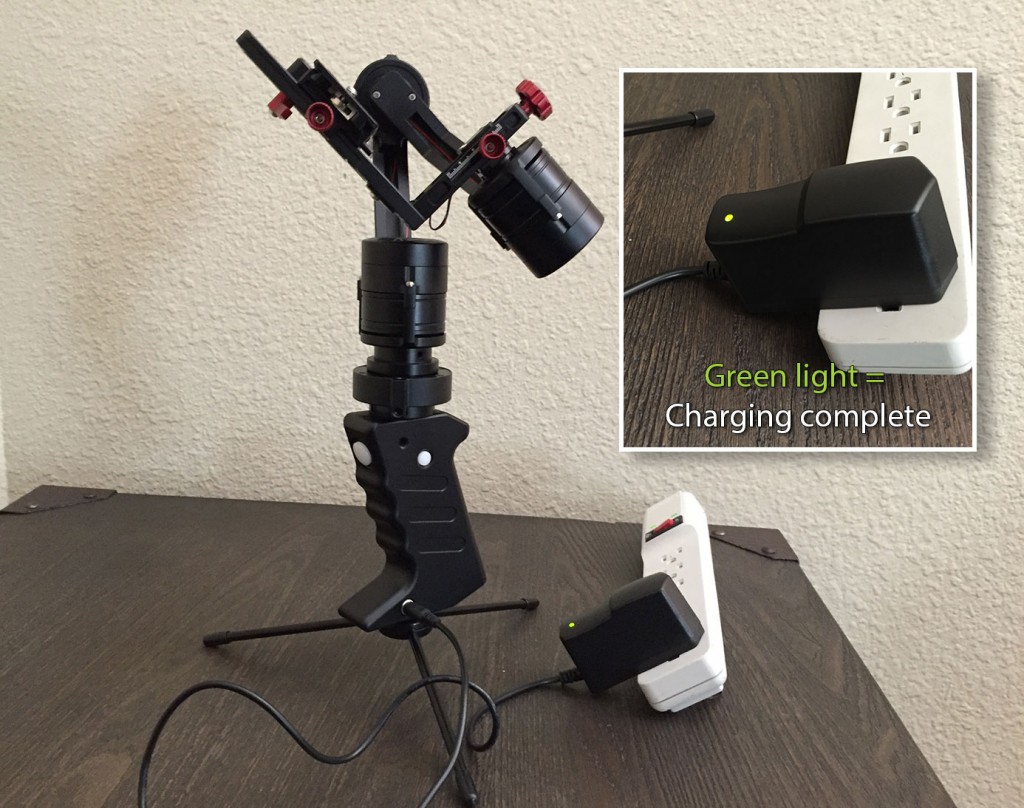
When plugged in, a red light on the plug shows that charging is currently in progress. Once full, the light will switch over to green, indicating the battery is completely charged and the gimbal is ready to use.
How do I charge my gimbal’s wireless remote?
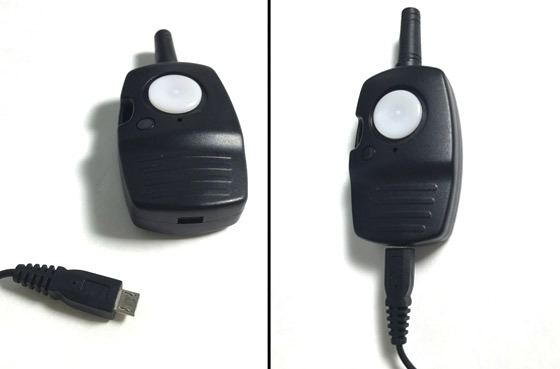
Many of our newer gimbals such as the CAME-Single, Mini 3, Argo, etc. now come with a wireless remote that allows you to toggle between profiles and control its pan/tilt movements. To charge the remote, you'll simply need a Micro USB cable and plug it into any wall outlet or portable USB charger. These Micro USB cables are very common, as they are the same type that charge many Android smartphones and numerous other mobile accessories.
Will my camcorder work with the CAME-Single?
Since its release, the CAME-Single has proven to be one of our most popular products. A large reason behind this is its compact form factor, and its ability to stabilize many smaller-to-medium size camera setups. Among these recommended setups are mirrorless cameras such as the Panasonic GH4, BMPCC, and Sony a7r / a7s line. That is, as long as the total payload (with lens & battery) falls underneath 2.6 lbs (1.1kg).
With that said, several potential customers have asked us if their traditional camcorder-style video camera can work with the CAME-Single. Even though most handheld camcorders will have a similar payload offering as the cameras listed above, form factor plays a key reason why we DO NOT recommend these for use with the Single.
First off, the physical design of most camcorders offer a different weight distribution, which can prevent optimal balancing. But more importantly, most (if not all) camcorders have a flip out LED screen on its left side that will be blocked by the Single's Pitch motor (same with Mini 1 & 2). So using the built-in camcorder screen will be null and void for use when mounted on the gimbal. As a work around, however, it is possible to run an HDMI line out of the camcorder and onto an external monitor.
But even with that said, gimbals wouldn't be an ideal recommendation. But if you still wish to provide stabilization to your camcorder, we'd suggest looking into our line of traditional steadicam-style stabilizers.
What are the maximum payloads of all your gimbals?
A few common questions that we receive from customers regarding our gimbals are (A) Does my camera & lens combo work? and (B) What is the gimbal's maximum payload?
Though this information can be found on all of our gimbals' respective product pages, below you will see a quick index showing the appropriate camera types along with the maximum payloads that each gimbal is designed to support.
CAME-Prophet
Cameras supported - Medium-sized DSLR cameras, including Canon 5D/7D Series, Panasonic GH4, Sony A7r/A7s series, etc.
Maximum Payload (including lens & accessories): 6.6 lbs / 3 kg
CAME-8000
Cameras supported - Larger camera setups, including BMCC, CANON C100/C300, RED EPIC, CANON 5D Series/7D Series, etc.
Maximum Payload (including lens & accessories): 11 lbs / 4.9 kg
CAME-TV Prodigy
Cameras supported -Larger camera setups, including SONY FS7, BlackMagic Design URSA MINI, RED RAVEN, RED EPIC, CANON C100/C300, CANON 5D Series / 7D Series, etc.
Maximum Payload (including lens & accessories): 15lbs / 7kg.
CAME-7500/7800/ARGO
Cameras supported - Medium-sized DSLR cameras, including Canon 5D/7D Series, Panasonic GH4, Sony A7r/A7s series, etc.
Maximum Payload (including lens & accessories): 6.6 lbs / 3.0 kg
Mini 3
Cameras supported - Smaller to medium-sized DSLR and mirrorless cameras, including BMPCC, Panasonic GH4, Sony A7r/A7s series, etc. with lighter lenses.
Maximum Payload (including lens & accessories): 2.6 lbs / 1.2 kg
Note regarding lens adapters: We strongly suggest that only native lenses be combined with your cameras while being mounted on these gimbals. Lens adapters such as metabones will add excess weight to the setup (plus usually attached to heavier lenses), which will exceed the max payload, and prevent your gimbal from balancing properly.
CAME-Mini 1, Mini 2, Single, Optimus,
Cameras supported - Small mirrorless cameras, including BMPCC, Panasonic GH4/GH5, Sony A7r/A7s series, a6300, etc. with lighter lenses.
Maximum Payload (including lens & accessories): 2.6 lbs / 1.2 kg
Note regarding lens adapters: We strongly suggest that only native lenses be combined with your cameras while being mounted on these gimbals. Lens adapters such as metabones will add excess weight to the setup (plus usually attached to heavier lenses), which will exceed the max payload, and prevent your gimbal from balancing properly
View CAME-TV's entire line of gimbals here.


